en
enCe bloc contient du contenu non valide ou inattendu.
Tentative de récupération du bloc
Estimated reading time: 17 minutes
Introduction
Using Octopush API service with Google Sheets for sending SMS-campaigns opens new opportunities for your messaging. By engaging Google Sheets powers, you can easily prepare text messages for thousands of recipients based on external sources. Send these messages with Octopush API SMS sender script. You will see server responses immediately at each message line. Engage a “simulation” mode provided by Octopush API to pre-check contact lists for free. Save time by avoiding data export and import to Octopush user panel after each minor change.
In this article, we will describe how to implement SMS sending and will perform test sending from regular Google Sheets table. For each recipient number we will specify the individual text. Besides, the solution will populate the table with Octopush API responses. The given approach applies to any tables with minor or no customization.
Prerequisites :
- Octopush account
- Google account
What it is and how it works?
The script (code) written in Google Script language (very similar to JavaScript) performs SMS sending by contacting Octopush API for each SMS submission. The full text of the script is given at the end of the article.
There are plenty of ways to solve the task of sending SMS via Octopush from Google Sheets. We consider only one of the possible ways with as simple script as possible.
Video
How long it takes to setup?
Start sending SMS via Octopush API directly from Google Sheets in roughly 5 minutes by performing 5 simple steps.
Setting up
1. Create an SMS data area
Login into your Google account and switch to Google Sheets application. Create a new SpreadSheet – it will serve as SMS data storage and Octopush account credentials storage.
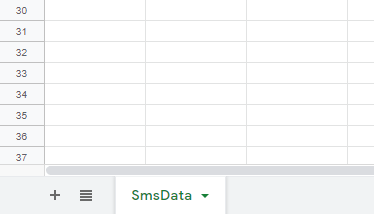
Name the first sheet as “SmsData” instead of “Sheet1”.
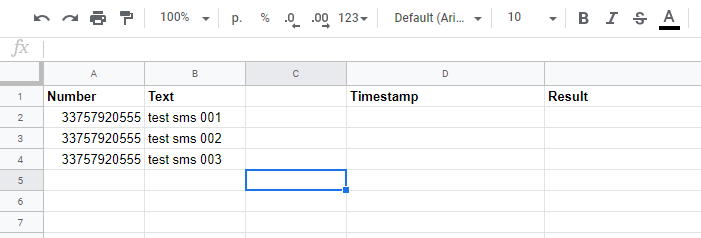
To automate the process of SMS sending, we need to keep data arranged in a certain order. Let us allocate numbers and texts for SMS-ing in the order the sending script expects. Here is a table structure example below.
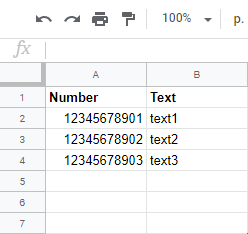
We put column headers in the first row. This row will serve as a key for data columns identification, although will not participate in SMS-sending.
As you may see from sample screenshot, the first column contains numbers and the second one – message texts. Column names are very important to match the names in our sending script. That is why if you change names in the table – please make sure you change them in the script too. At the same time, the column’s order is not important at all.
The next screenshot shows the table with several SMS data lines.
2. Create a server response area
Let us add “Timestamp” and “Result” column names in the first row. These columns will store date/time and the text of server response (the result) related to SMS data in the same row. We keep column “C” as empty separator between “SMS data area” and “Server responses area” although it is not necessary column.

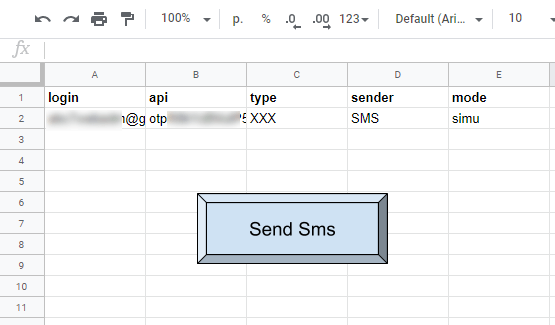
3. Create an area with Octopush authentication data and settings
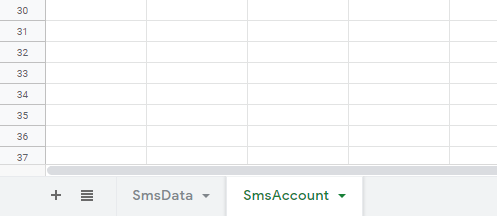
Choose the next sheet (probably Sheet2) at the bottom of this SpreadSheet, and rename it to “SmsAccount”. We will place all related Octopush account data here. Also we will put here the button for starting SMS-sending later.
Put column names in the table like the following screenshot shows. Below column names, you need to specify your respective account data.
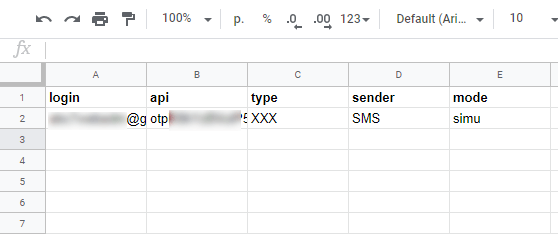
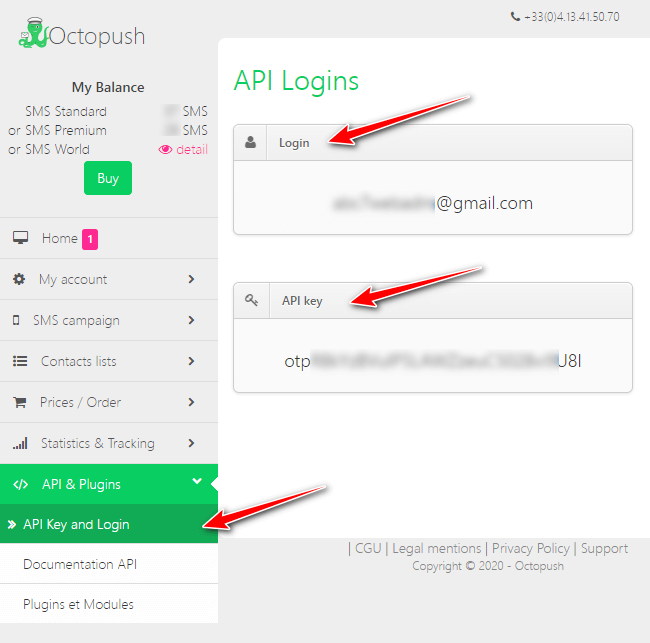
Just copy/paste data for the first two fields (login and API key) from Octopush user panel at https://www.octopush-dm.com/en/api-logins
How to fill other fields:
type – defined the type of SMS-route (XXX = Low Cost SMS; FR = Premium SMS; WWW = Global SMS). Type XXX for start and testing.
sender – the alphanumeric sender name. Depends on your Octopush service type. Use “SMS” for start and testing.
mode – is a very important field. It switches the way of processing SMS by Octopush API between “real” and “fake”. Value “simu” means simulation of sending (fake). The simulation will not send any real SMS neither spends your balance money while giving you correct API responses. Any other text (or no text) in that field will allow API to perform actual sending (real). We recommend keeping it “simu” until you sure to send your SMS campaign.
4. Create (copy/paste) an SMS sender script
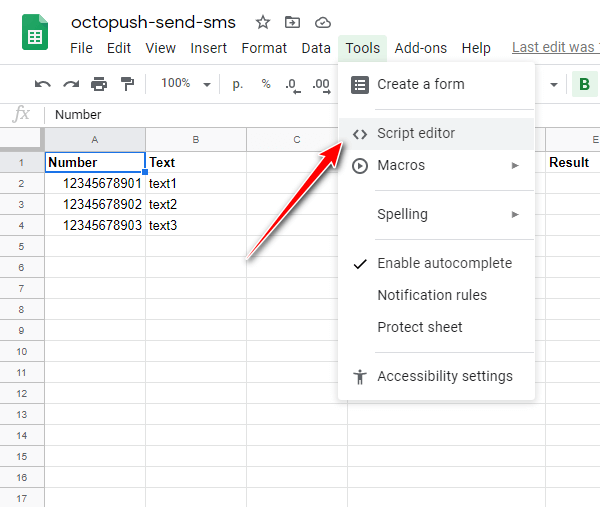
It’s obvious the Google Sheets can’t send SMS itself. To perform SMS sending we will need to create simple SMS sender script. Open “Tools” menu and choose “Script editor”:
You should get to a new browser tab named “Script Editor” – it should looks similar to this:
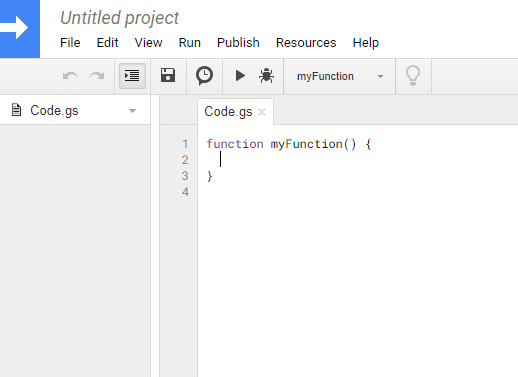
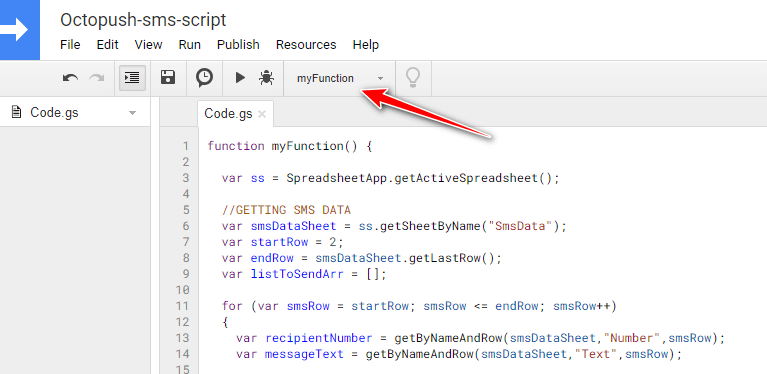
Instead of “Untitled project” type in something more meaningful like “Octopush-sms-script” and save (normally saving happens automatically after changes). Get the script text at the end of our article and copy/paste it into the “Script Editor” code area.
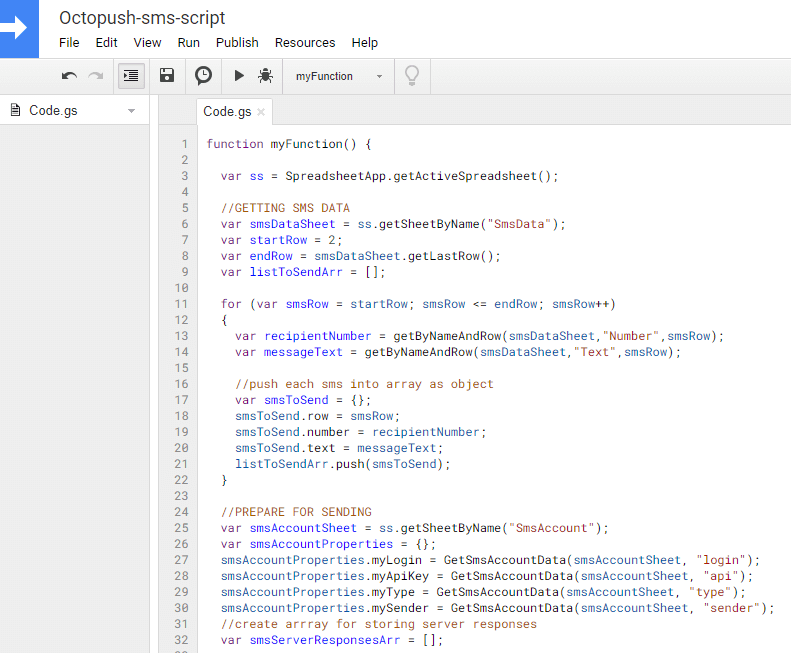
Save it and make sure the “myFunction” is selected as a starting function for the script. Because this function should always run first.
Now try to run the script by pressing the “Run” button (looks like a Play button). Do not worry, it will send nothing yet.
You should get this kind of authentication request from Google on this first run attempt.
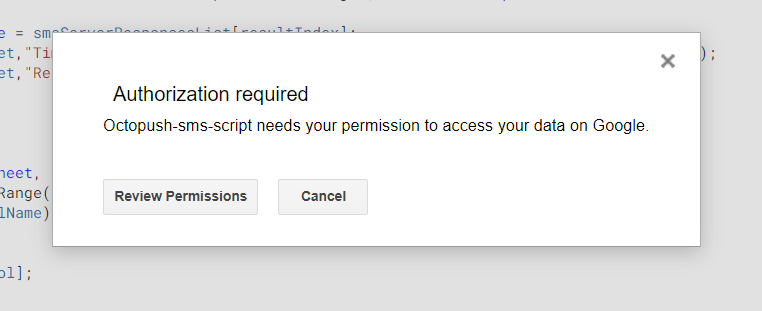
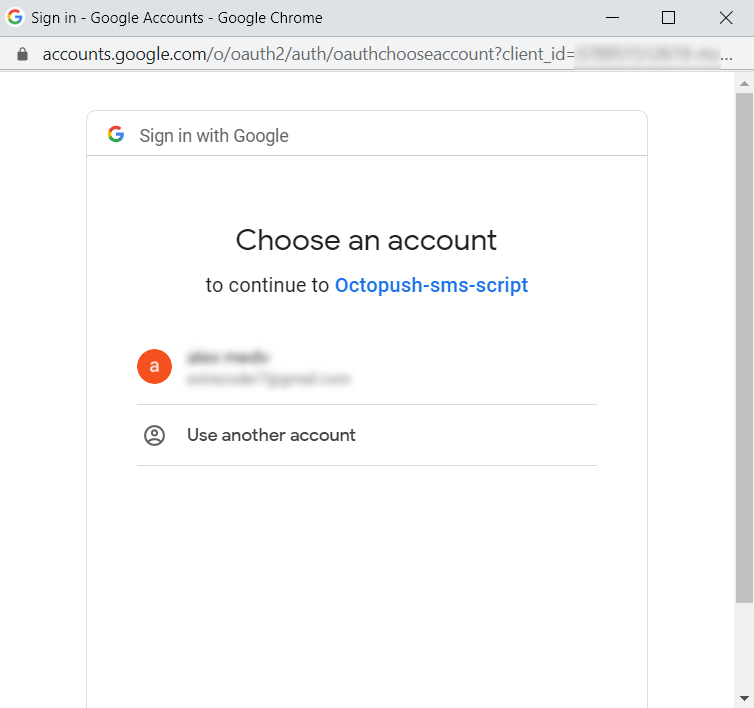
This happens because “Script Editor” belongs to the standalone Google service and you need to allow it access data from your Google Sheets application. Click “Review Permissions”, choose your Google-account and complete authentication.
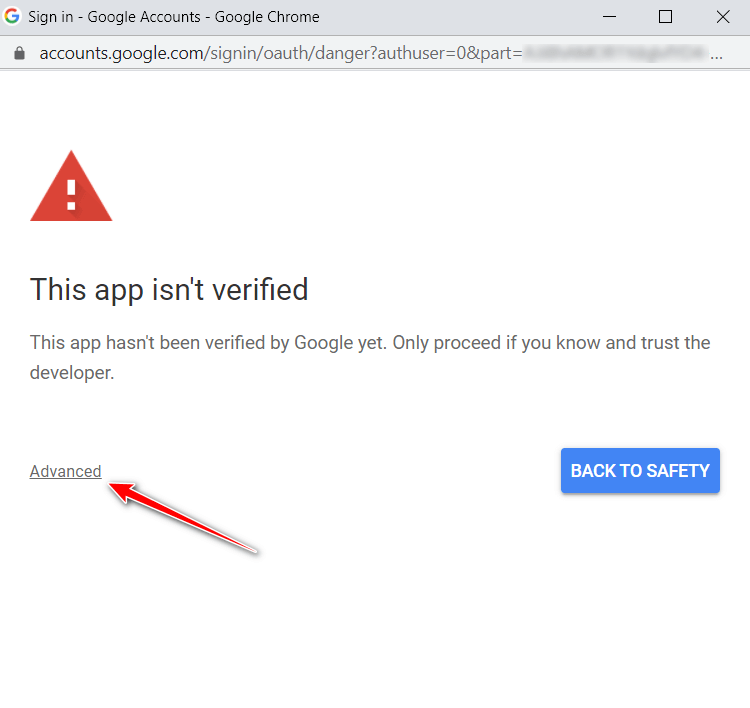

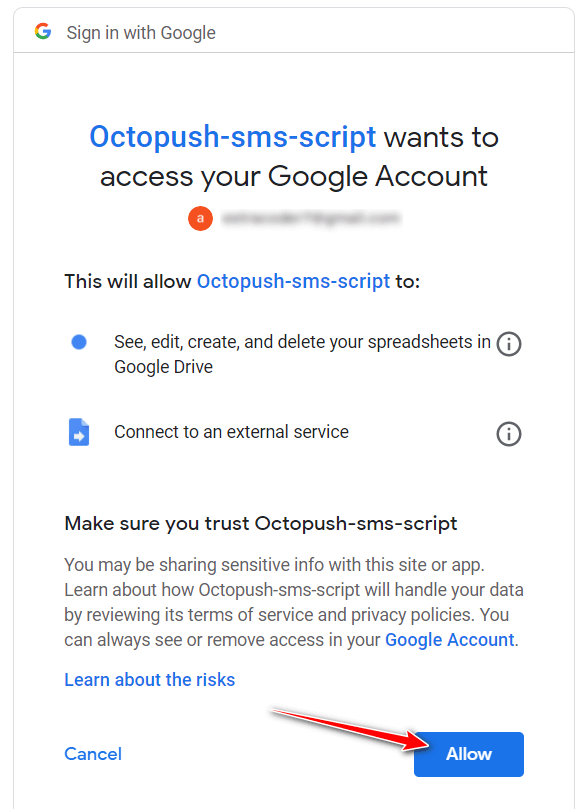
After getting this done all consequent runs should not require any authentication. Only after a few weeks the same authentication request may appear again – this is normal behavior for systems relying on an Oauth authentication model, as Google does.
5. The “SEND SMS” button and the first run
Please note, we use safe “simulation” mode in our example. It prevents actual SMS sending during test/debugging phase. So if you wonder why no SMS arrive at the first run – please check these settings described below.
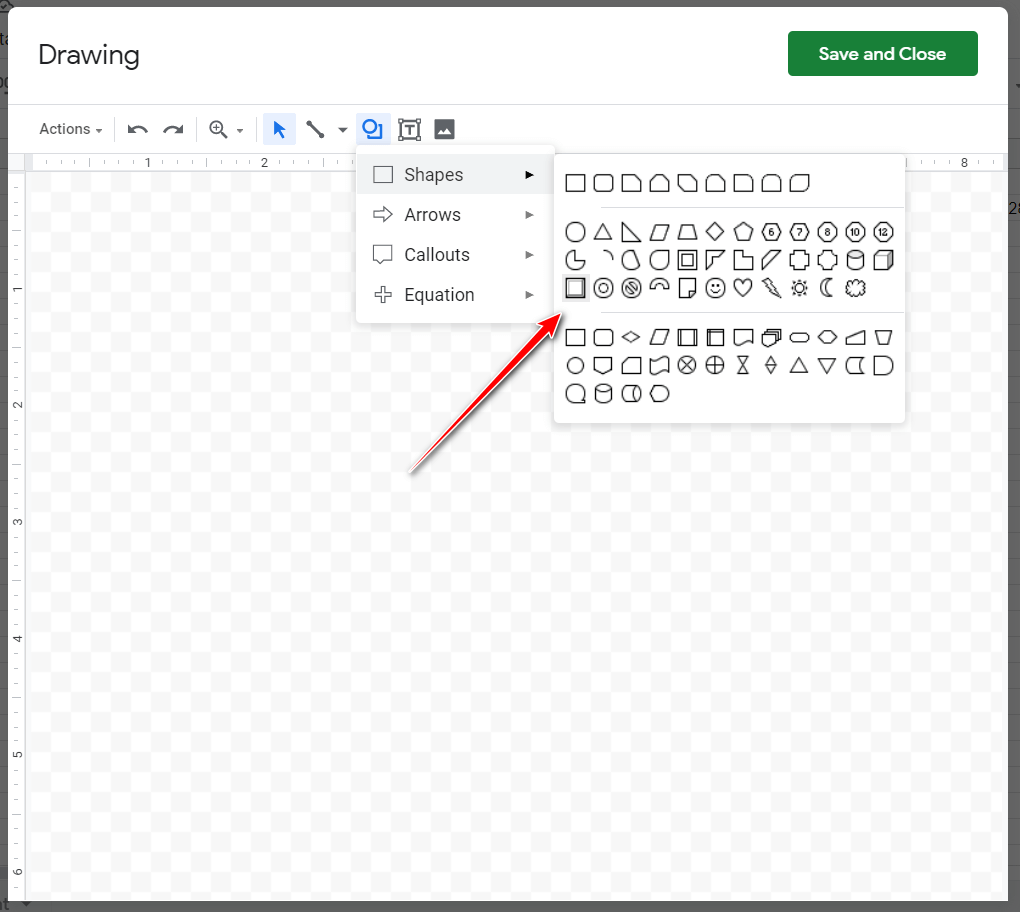
To run the script you need to click “Run” button in the “Script Editor” (always make sure start function “myFunction” is selected). However, we will make it a bit more comfortable to use. We will add “Send SMS” button to one of our SpreadSheet tables. You can put the button to any Sheet of the Spreadsheet, but in our example, let us put it at “SmsAccount” sheet. The simple reason for that – before sending SMS you will always see if the Simulation mode is active.
First, make sure the “SmsAccount” sheet is selected. Then use the top menu “Insert” and choose “Drawing” submenu. Then click Shape/Shapes at the top right corner of the new window. As a result, you should see the following window. Choose the element marked by the red arrow to have a nice looking button, or any other element you like.
Click and drag to make a button, and then double-click it and type in the text “Send SMS”. Use top menu to enable text centering if you’d like to.
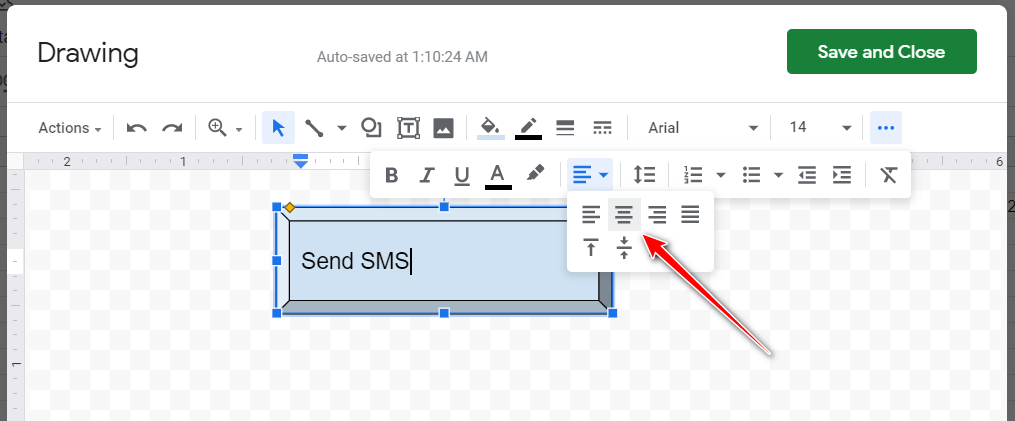
Click “Save and Close” to complete button insertion into the table. Drag and place the button wherever you like.
Now click the button and choose three vertical dots on the right top side. In this menu choose “Assign Script”.
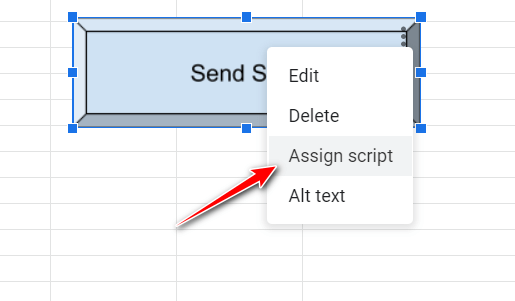
Inside new dialogue window write “myFunction” or any other start function name you implemented.
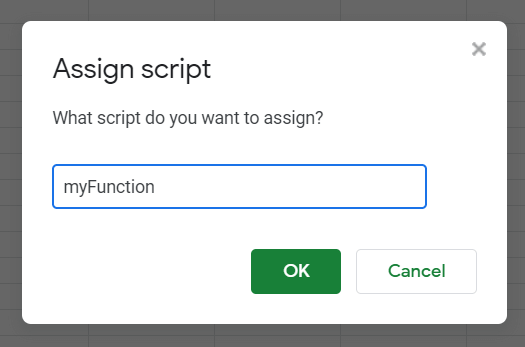
After clicking “OK” the button will be updated and now connected to calling “myFunction” of our sample script available in “Script Editor”. Please note, after setting up this connection each time you perform a left click on the button – you will start the function. To avoid function calls when you need to change button properties do a right click or keep Ctrl pressed and then left-click. Now you should have a layout similar to this.
After each click on “Send SMS” button, you should see several consequent popup messages at the top of the screen. The first message is “Running Script” also includes times and “cancel” button. The message “Finished script” comes when execution is complete.
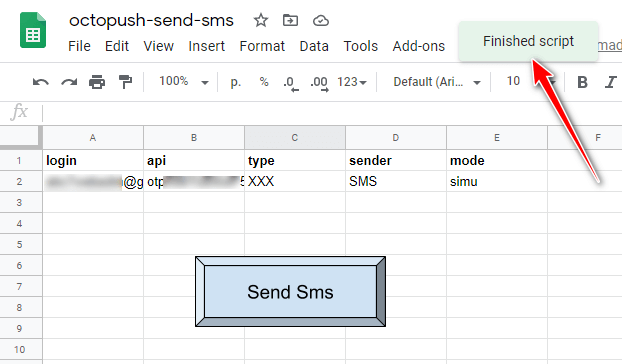
After this completed all sending results will appear at “SmsData” table in “Timestamp” and “Result” columns. You may switch to “SmsData” sheet right after clicking “Send SMS” button – no need to wait the script to complete. At “SmsData” sheet you will see table cells get filled with server responses near real-time. Before next sending, you may want to clean (or copy) cells data manually, otherwise the script will automatically overwrite all previous data in these columns.
This is how the table looks before sending (no server responses collected yet).
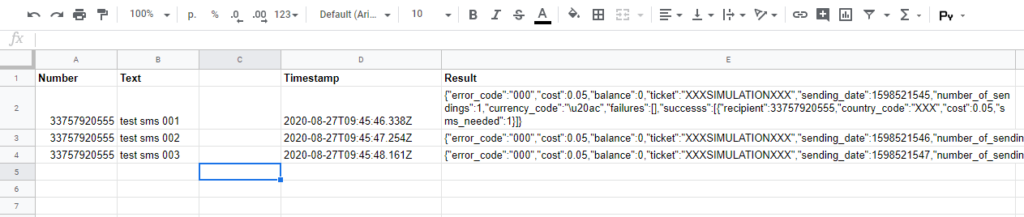
This is a table after messages sending complete.
If you see {error:100}, {error:103} or other response codes in the “Result” column you need to consult with “Return codes” reference at the official Octopush API documentation source (https://octopush.com/en/sms-gateway-api-documentation/return-codes/). Error code may relate to sender number, text or to some other settings or service rules and will help you to debug.
Here in the “Result” column field, please note the word “SIMULATION”:

It means the request for sending SMS is performed in “simulation” mode, i.e. message was not sent, credits was not deducted but you got an API response to the request. Octopush API provides this great feature and it’s extremely helpful when debugging your application or script. To switch sending into “real sending” mode, you need to go to “SmsAccount” sheet, and change value in “mode” column to any value different from “simu”.
After “simu” removed from “mode” column, the server responses will look different – similar to this:
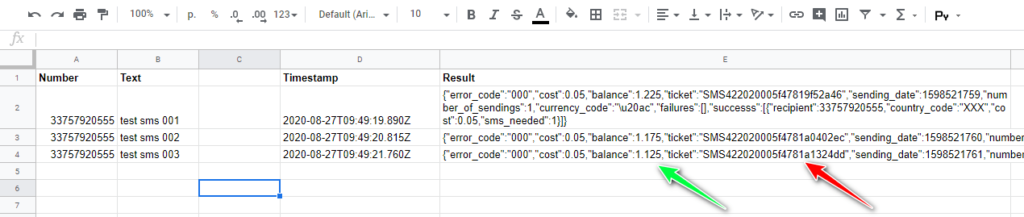
Please note the absence of “Simulation” word and balance decreasing each time SMS sent (pointed by green arrow) according to SMS cost.
Conclusion
Sending SMS from Google Sheets application opens new opportunities for creating flexible and up to date campaigns as well as various data source integrations. Our example shows the general approach to SMS campaign implementation by means of such free services as Google Sheets and Google Script. The given script covers only basic functions. There are plenty of ways to improve it depending on your task. You may also find some ideas of how to improve the script below.
Understanding the SMS sender script
Once you have entered the “Script editor” you have got the default code.gs script created and empty “myFunction” function declared inside it. Let us not change its name but append with our code (get full code at the end of the article).
There are capital letter comments inside the function “myFunction” of our script. These comments show the meaning of different code parts. During execution, script engages these parts consequently.
The main steps of script execution are:
- “GETTING SMS DATA” – collecting data from table “SmsData” and creating messages list
- “PREPARE FOR SENDING” – reading authentication data and settings from “SmsAccount” table
- “SENDING SMS” – sending messages from the list via the Octopush API service, and storing each API server response
- “DISPLAY SERVER RESPONSES” – adding server responses to “SmsData” table
The code in “GETTING SMS DATA” fragment selects table “SmsData” from current SpreadSheet. It sets/detects the first row of the SMS data area as well as the last row of it. It also declared an array for storing ready to send messages. The for-loop below picks each table row and extracts values from Text and Number columns. It also stores the row number to be used later in matching server response to original message row in the SMS data table.
The code in “PREPARE FOR SENDING” engages “SmsAccount” table and collects data for Octopush API authentication and message sending. It also declares an empty array for storing server responses.
The code fragment “SEND SMS” implements main SMS sending loop. It goes through all ready to send messages one by one, sends them via Octopush as separate transactions and pushes each server response into an array. Besides server response, it stores current timestamp and “SmsData” table row number. This code fragment also has “delay” command to make a small pause between consequent server queries (1 query per 1 SMS). Some servers may consider intensive (no delay) querying as an attack. In addition, the intensive querying is a subject to throttling i.e. forceful disconnecting if a user exceeds some limits of SMS sent per second or per minute.
The next code fragment adds server responses to “SmsData” table. It helps to see if the operation was successful or not, as well as to know more about the reasons by exploring response code meanings.
Ways to make the SMS sender script more advanced:
- Consider implementing various pre-sending checks like if message body is empty or incorrect number provided etc. to avoid submitting incorrect messages for sending
- Choose an optimal delay between message submissions
- Make the script insensitive to column name letter case
- Make asynchronous SMS submissions
- Display confirmation dialogue before sending begins, as well as generate results/errors report after sending complete. The report may include general stats as well as warnings like zero balance etc.
Sample Google Script to send SMS using Octopush API from Google Sheets
function myFunction() {
 var ss = SpreadsheetApp.getActiveSpreadsheet();
 //GETTING SMS DATA
   var smsDataSheet = ss.getSheetByName("SmsData");
   var startRow = 2;
   var endRow = smsDataSheet.getLastRow();
   var listToSendArr = [];
 for (var smsRow = startRow; smsRow <= endRow; smsRow++)
   {
     var recipientNumber = getByNameAndRow(smsDataSheet,"Number",smsRow);
     var messageText = getByNameAndRow(smsDataSheet,"Text",smsRow);
 //push each sms into array as object var smsToSend = {}; smsToSend.row = smsRow; smsToSend.number = String(recipientNumber); smsToSend.text = String(messageText); listToSendArr.push(smsToSend);
 }
 //PREPARE FOR SENDING
   var smsAccountSheet = ss.getSheetByName("SmsAccount");
   var smsAccountProperties = {};
   smsAccountProperties.myLogin = GetSmsAccountData(smsAccountSheet, "login");
   smsAccountProperties.myApiKey = GetSmsAccountData(smsAccountSheet, "api");
   smsAccountProperties.myType = GetSmsAccountData(smsAccountSheet, "type");
   smsAccountProperties.mySender = GetSmsAccountData(smsAccountSheet, "sender");
   smsAccountProperties.requestMode = GetSmsAccountData(smsAccountSheet, "mode");
   //create arrray for storing server responses
   var smsServerResponsesArr = [];
 //SENDING SMS
   //do sending and push server responses into array
   for (var smsIndex = 0; smsIndex < listToSendArr.length; smsIndex++)
   {
     //getting sms to send
     var smsToSend = listToSendArr[smsIndex];
 //do sending and get response var smsServerResponse = SendSms(smsAccountProperties, smsToSend); //making pause to avoid throttling or looking as DDOS attack Utilities.sleep(500); //object to store result and related data var smsServerResponseObj = {}; smsServerResponseObj.row = listToSendArr[smsIndex].row; smsServerResponseObj.timestamp = new Date().toISOString(); smsServerResponseObj.result = smsServerResponse; //store sms result smsServerResponsesArr.push(smsServerResponseObj);
 }
 //DISPLAY SERVER RESPONSES
   DisplayServerResponse(smsDataSheet, smsServerResponsesArr);
 }
 function GetSmsAccountData(dataSheet,colName) {
   var data = dataSheet.getDataRange().getValues();
   var col = data[0].indexOf(colName);
   if (col != -1) {
     var result = data[1][col];
     return result;
   }
 }
 function SendSms(smsAccData, smsObject)
 {
   var url = "https://www.octopush-dm.com/api/sms/json";
   var options = {
     "method": "post",
     "payload": {
       "user_login": smsAccData.myLogin,
       "api_key": smsAccData.myApiKey,
       "sms_text": smsObject.text,
       "sms_recipients": String(smsObject.number),
       "sms_type": smsAccData.myType,
       "sms_sender": smsAccData.mySender,
       "request_mode": smsAccData.requestMode
     }
   };
   var response = UrlFetchApp.fetch(url, options);
   //var response = "some text from API on "+smsObject.number+" "+smsObject.text; //test value
   return response;
 }
 //put results into sending table next to original messages
 function DisplayServerResponse(smsDataSheet,smsServerResponsesList)
 {
   for (var resultIndex = 0; resultIndex < smsServerResponsesList.length; resultIndex++)
   {
     var singleSmsServerResponse = smsServerResponsesList[resultIndex];
     setByNameAndRow(smsDataSheet,"Timestamp", singleSmsServerResponse.row, singleSmsServerResponse.timestamp);
     setByNameAndRow(smsDataSheet,"Result", singleSmsServerResponse.row, singleSmsServerResponse.result);
   }
 }
 //helping functions
 function getByNameAndRow(dataSheet, colName, row) {
   var data = dataSheet.getDataRange().getValues();
   var col = data[0].indexOf(colName);
   if (col != -1) {
 var result = data[row-1][col]; return result;
 }
 }
 function setByNameAndRow(dataSheet, colName, row, value)
 {
   var data = dataSheet.getDataRange().getValues();
   var col = data[0].indexOf(colName);
   if (col != -1 && row !=1) {
     var myCell = dataSheet.getRange(row,col+1).setValue(value);
 }
 }